Water Bottle Cap Garland – DIY

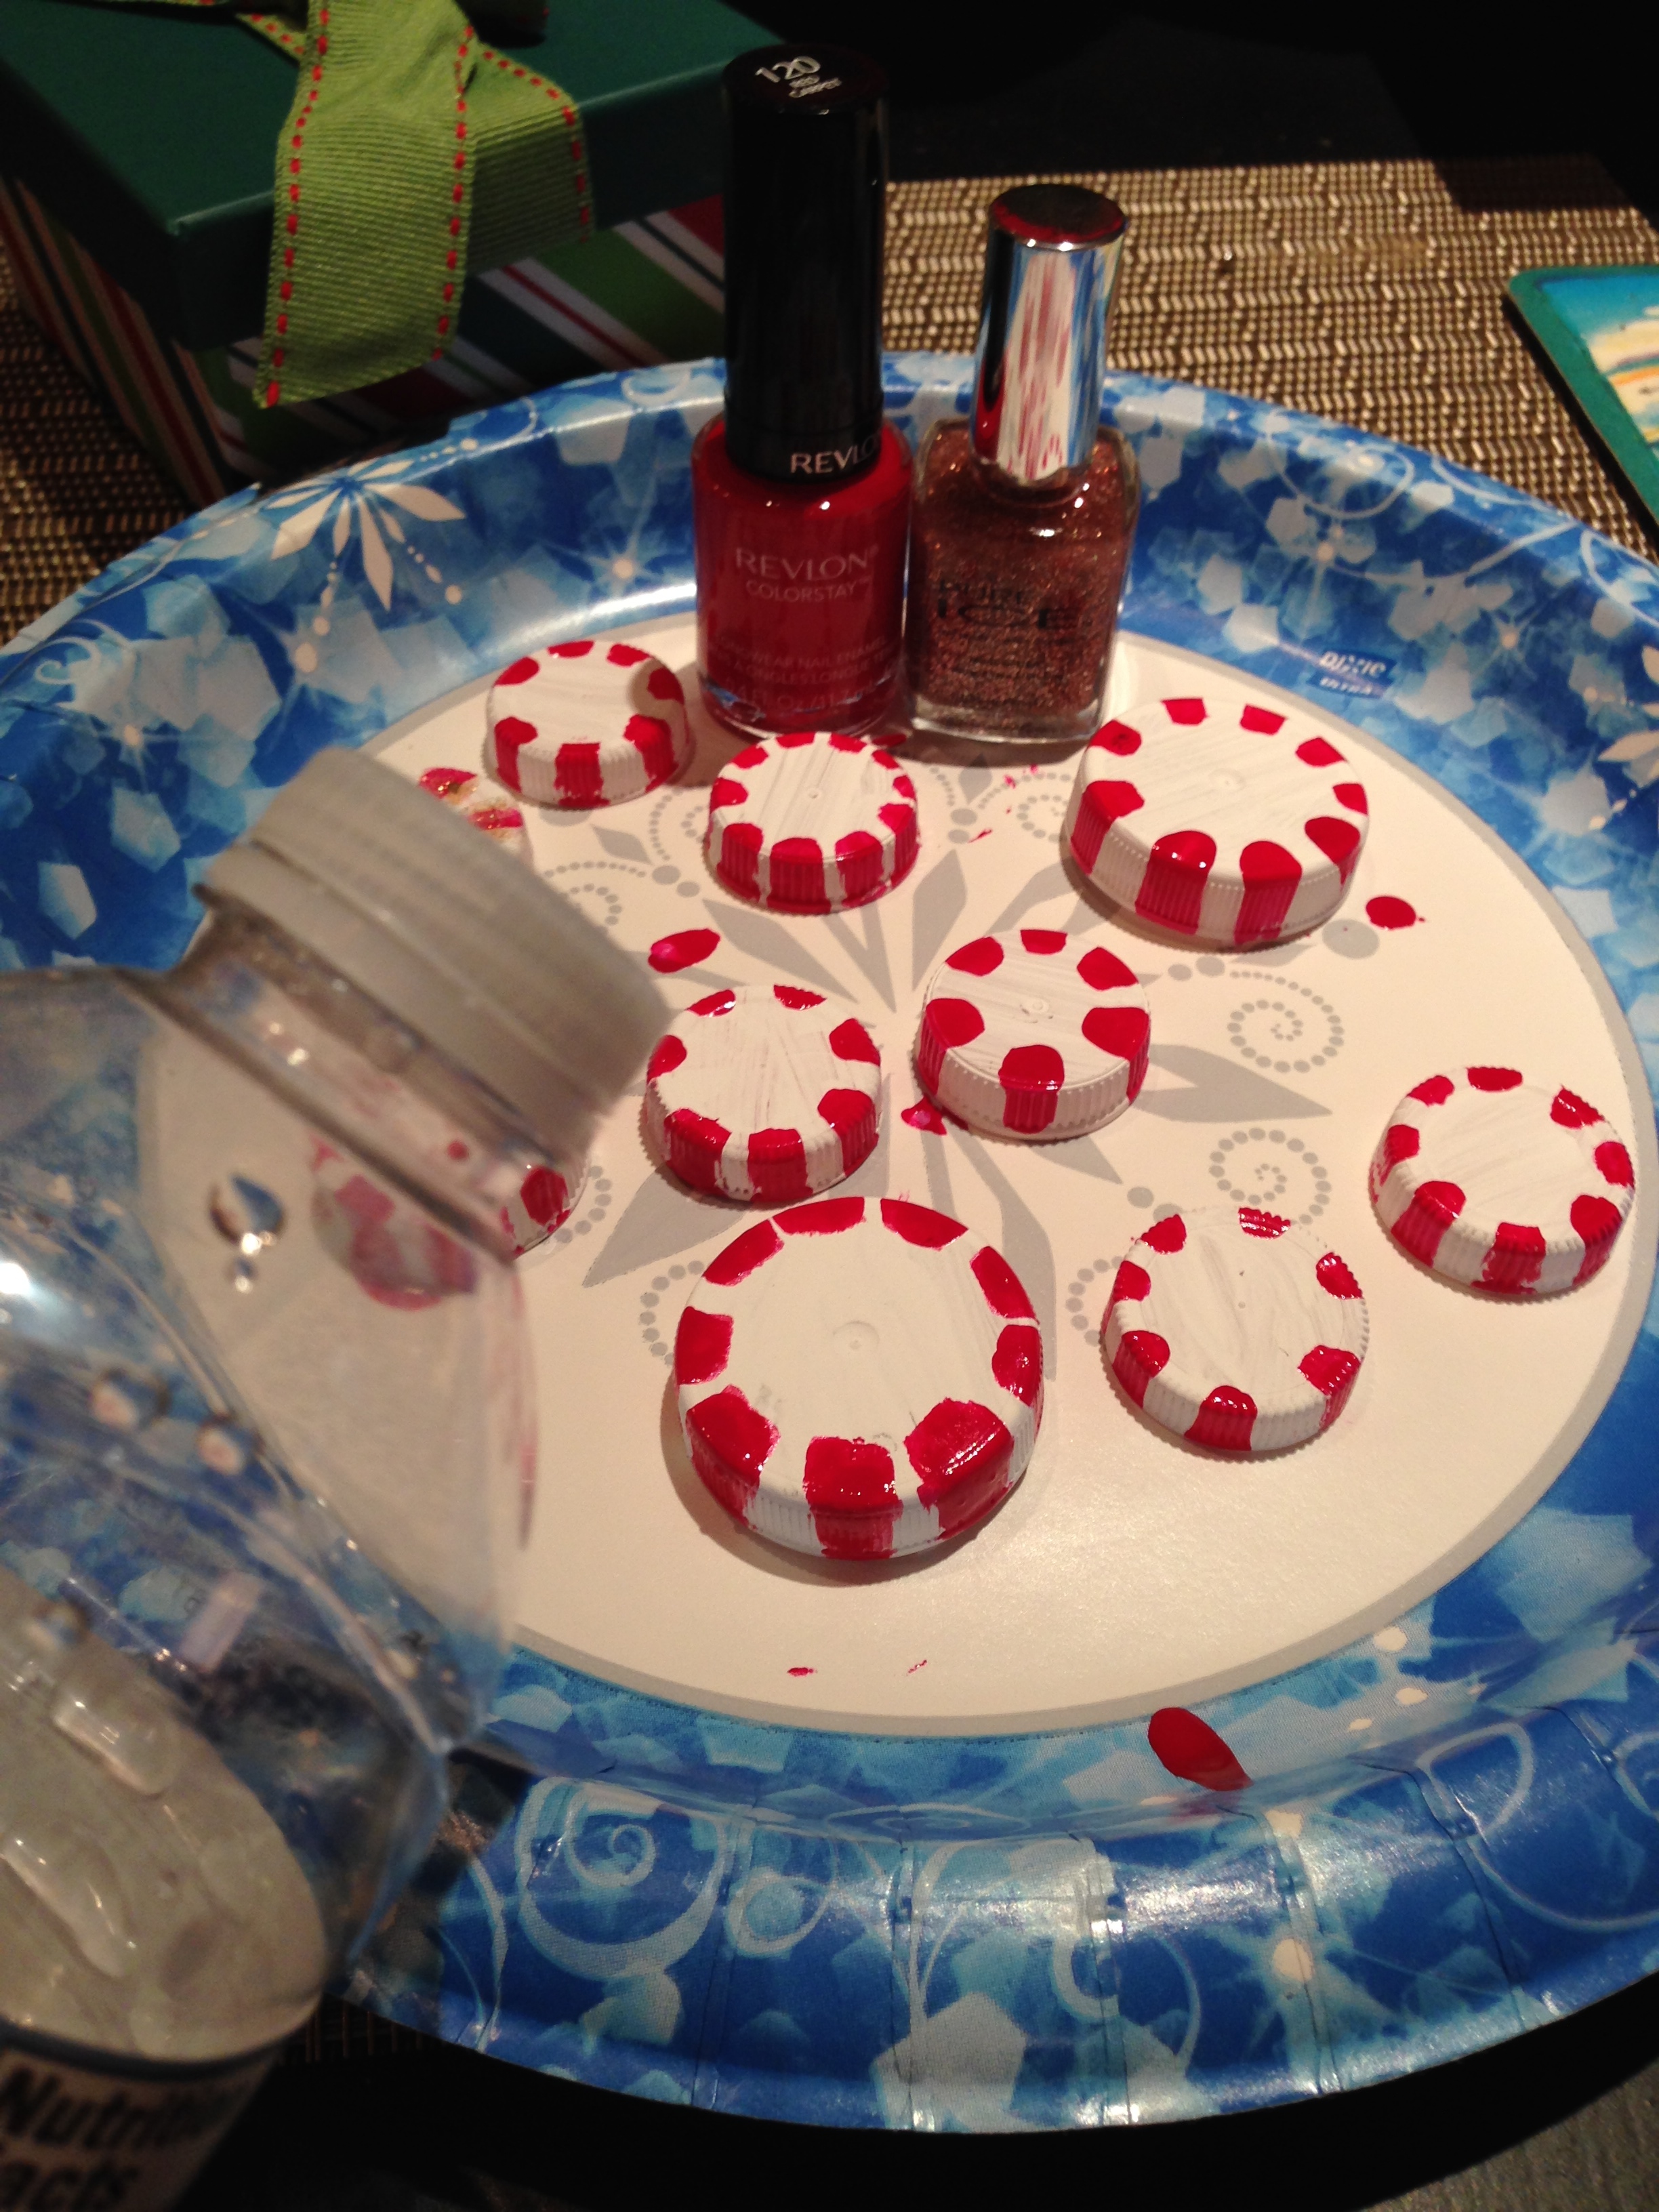
I have once again been inspired by my overflowing recycle bin. If you recall, I had a similar experience last year . I started collecting water bottle caps about a month ago in addition others that were flat, whitish and round (half gallon milk containers work great). This project is great for kids, classrooms, crafters, etc. Since I am moving at the end of the month, I did not showcase the garland as I normally might – think tree, bannister, mantle… you get the picture 😉 I must also confess I was in a rush, so my handiwork is a wee bit “meh”. That said, I hope there is enough here to inspire up cycling and the Christmas spirit …even if at the bottom of a blue plastic bin 😉 Here’s what you need:
Supplies
-Plastic water bottle caps (feel free to use milk caps, etc.)
-Small painting brush
-White acrylic craft paint
-Red nail polish, clear or light colored glitter polish, or just plain red glitter polish (craft paint works too)
-Wire (ornament hangers, ribbon, jump rings, anything to affix candy to string)
-Cord cut to your desired length (ribbon, fishing wire, beading wire, string is fine too)
-Hole punch (metal punch, leather punch, anything that can create a small hole through plastic)
Instructions
-Paint bottle cap white and let dry
-Use red polish for the stripes. Begin in a north, south, east, west formation. Fill in additional stripes once you have created the four points – easier to create symmetry this way. Don’t paint too far beyond the edge of the cap as it begins to distort the “candy” effect. Those of you who are more artistic should go for the swirl look, see below — takes some skill and a good brush.
-Once polish has dried, apply sparkle coat
-Once all paint has set punch hole at one end (size of hole depends what medium you select for stringing)
-Attach candy to string. You can use various methods: Wire candy to cord (I twisted ornament hangers), affix jump rings and create separate hole in ribbon, create two holes and knot your string on each end of candy. Bottom line is to make sure “candy” does not move across the string.


Enjoy the holidays everyone!
Cheers,
P
CD Ornament - DIY

It's Not About The Mold
You May Also Like

Water Bottle Christmas Ornament – DIY

Lake Glass
